A garage workshop isn’t just a place to store tools, it’s the command center for DIY projects, repairs, and creative builds. The difference between a functional workspace and one that frustrates you comes down to layout. When a crafter walks into their garage, they shouldn’t waste time hunting for a drill or clearing a workbench just to start a simple project. This guide walks through designing a garage workshop layout that maximizes square footage, keeps tools within arm’s reach, and lets work flow naturally from one station to the next. Whether starting from scratch or reorganizing an existing space, these principles help create an efficient, safe, and genuinely usable workshop that supports both small repairs and ambitious builds.
Table of Contents
ToggleKey Takeaways
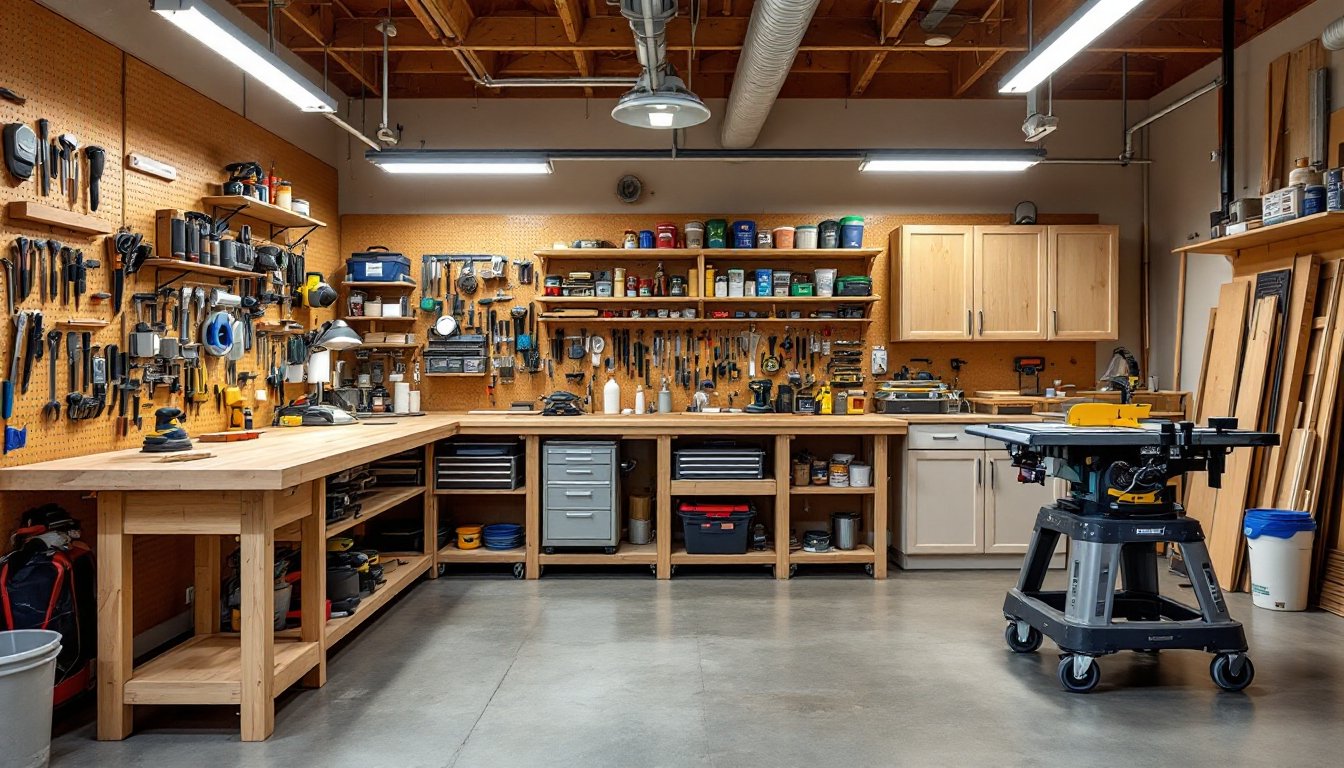
- A functional garage workshop layout divides the space into distinct work zones—such as a primary workbench, power tool station, hand tool storage, and bulk material storage—to maximize efficiency and reduce time spent hunting for tools.
- Wall-mounted storage solutions like pegboard, French cleats, and magnetic strips transform dead wall space into accessible organization, keeping tools visible and within arm’s reach without cluttering the work surface.
- Proper lighting, electrical circuits, and ventilation are non-negotiable: install LED shop lights (50 lumens per square foot), multiple 20-amp dedicated circuits with GFI outlets, and dust collection or exhaust fans to maintain safety and air quality.
- Design your garage workshop layout to mirror the natural workflow of a typical project—material storage to rough cut to assembly to finishing—positioning heavy tools like table saws near material storage and detail work near natural light.
- A sturdy 4-by-36-inch workbench with integrated vise, closed storage below, and vertical shelving above creates an organized anchor point that supports both small repairs and ambitious builds.
Assess Your Space and Establish Work Zones
Before moving a single tool, measure the garage from wall to wall and note ceiling height, electrical outlet locations, and any fixed obstructions (furnace, water heater, support posts). A typical two-car garage is about 20 feet wide by 20 feet deep, roughly 400 square feet, but account for vehicle access if you’re parking inside.
Divide the space into zones based on the work you actually do. A basic workshop includes: a primary workbench zone for assembly, repair, and measurement work: a power tool station for saws and sanders: a hand tool storage area with easy access: and bulk storage for lumber, fasteners, and materials. If the garage also houses seasonal items or vehicles, leave those zones clearly marked and protected from tool clutter.
A good rule of thumb is to keep the main pathways clear and at least 3 feet wide for maneuvering sheet goods or moving equipment. Position high-traffic work zones (primary workbench, saw station) near the garage entrance to avoid dragging materials across the entire space. If natural light enters from a particular side, place detail-oriented tasks, like fine assembly or electronics work, near those windows.
Plan Your Storage and Organization System
Smart storage separates an efficient workshop from an overstuffed garage. Start by sorting tools into categories: hand tools, power tools, fasteners, measuring instruments, and consumables (sandpaper, caulk, paint). Each category needs its own zone, and everything should have a home.
Wall-Mounted Storage Solutions
Walls are real estate. Installing pegboard, slat walls, or wall-mounted tool racks transforms dead space into accessible storage. Pegboard is affordable and flexible, holes accommodate hooks, bins, and holders for common hand tools. Space the wall 1 to 1.5 inches from the studs (using spacers) so hooks can seat fully. A 4-by-8-foot sheet covers a solid wall section: fasten it every 16 inches at studs using lag bolts.
For heavier loads, French cleats or wall-mounted shelving anchored directly into studs work better. A typical cleat system uses two interlocking boards (usually 1-by-4 or 1-by-6 lumber) cut at a 45-degree angle, one bolted to the wall, the other to the back of a cabinet or shelf. This distributes weight evenly and allows tools to hang securely without sagging.
Magnetic strips mounted above or beside the workbench hold chisels, drill bits, and other ferrous tools upright, keeping them visible and sharpened. Label every storage zone so tools return to the correct spot, chaos returns instantly once organization breaks down.
Workbench and Shelving Integration
The workbench is the workshop’s anchor. A sturdy workbench, 32 to 36 inches high with a surface at least 2 feet deep and 4 feet wide, supports assembly, repair, and detail work. Consider a benchtop with a built-in vise at one end: a Record Vise or similar (budget $80–$200) clamps workpieces securely for sawing, chiseling, or drilling.
Integrate closed storage beneath the benchtop for fasteners, finishing supplies, and light power tools. Open shelving underneath lets heavier items (sanders, routers, batteries) stay accessible. If bench space is tight, a mobile workbench on locking casters frees square footage, roll it to a clear area when needed, tuck it into a corner when not in use.
Vertical shelving above or behind the workbench keeps frequently used items (paint, brushes, measuring tapes) within arm’s reach without cluttering the work surface itself.
Optimize Lighting, Power, and Ventilation
Poor lighting makes mistakes: poor ventilation makes fumes. Both are non-negotiable in a functional workshop.
Lighting: Overhead LED shop lights (typically 4- or 8-foot fixtures rated 4000–5000K color temperature) provide even, cool-white illumination across the whole space. Budget 50 lumens per square foot as a baseline, so a 400-square-foot garage needs roughly 20,000 lumens total. Supplement with task lighting (clip lamps, work light stands, or LED strip lights under shelves) focused on the primary workbench and detail areas. Shadows are a safety hazard and a creativity killer.
Electrical: Workshop demand is heavy. A 20-amp circuit typically supports one large power tool at a time: most garages need at least two dedicated circuits for tools, plus a third for compressors or welding rigs if used regularly. Install GFI (ground-fault-interrupting) outlets within 6 feet of water sources and 125V GFI-protected outlets elsewhere, code requirement in most jurisdictions. Outlet placement matters: position them along work-zone walls at 36 to 48 inches above the floor so cords don’t cross pathways. A surge-protected power strip with individual switches lets you cut power to idle tools.
Ventilation: Dust, fumes from paint or adhesives, and accumulated heat all degrade air quality and tool performance. A shop vacuum with a ceiling-mounted dust collection system handles heavy sawdust. For chemical fumes, a portable air filter (rated for the garage’s cubic footage) or a wall-mounted exhaust fan helps. If the garage is attached to the home, ensure ventilation exhausts outside, not back into living spaces.
Arrange Your Workflow for Maximum Efficiency
A good workshop layout mirrors the flow of a typical project: material storage → rough cut/prep → assembly → finishing → cleanup.
If building furniture or trim, position the miter saw or table saw (with outfeed table space) near the material storage area so you’re not carrying lumber across the whole garage. The saw station needs a clear zone behind it, at least 4 feet for safety and stock runoff. Group hand planes, chisels, sandpaper, and finishing supplies near the workbench, where detail work happens. Store solvents, rags, and cleanup materials in a fire-safe cabinet near a utility sink if one exists.
For electronics work, assembly, or repair, where precision and focus matter, the primary workbench should be away from saw dust and machinery noise. A small shelf nearby for reference manuals, test equipment, or small-part bins keeps projects organized without cluttering the bench itself.
Keep a first-aid kit and fire extinguisher visible and accessible (mount them on a wall, not buried in a cabinet). Post emergency contact info and a brief safety reminder above the main work area. Maintain clear floor space, tripping on a tool or cord while operating machinery is avoidable with discipline.
Think about the order of your heavy tools, too. If you use the table saw several times a week and the miter saw sporadically, position the table saw in the primary work zone and move the miter saw to secondary storage when not actively in use. Mobile bases or wall-mounted racks (for cordless tools) keep the floor uncluttered and ready for the next project.
Conclusion
A well-designed garage workshop layout isn’t a one-time project, it evolves as skills develop and tool collections grow. Start with the essentials (workbench, lighting, storage for current tools), then adapt as needs change. The core principle remains constant: every tool in a logical place, every zone separated, and every workflow unobstructed. When a crafter opens the garage door and sees an organized, lit, and inviting space, half the battle is already won. The other half is the project itself.