A shipping container garage transforms a budget-conscious DIYer’s world. These steel boxes, 40 or 20 feet long, weatherproof, and sitting on a foundation, are becoming the go-to workshop solution for those tired of squeezing projects into a one-car garage or renting expensive storage. Unlike traditional stick-frame sheds, containers arrive whole and require far fewer framing skills. They’re also modular: stack two for more space, or keep it simple with one. The real work isn’t cutting and nailing: it’s planning the layout, getting the utilities right, and understanding what permits you’ll actually need. This guide walks through the essentials: site prep, structural modifications, insulation, electrical rough-in, and workspace design, the decisions that separate a functional workshop from a glorified storage locker.
Table of Contents
ToggleKey Takeaways
- A shipping container garage costs $2,000–$4,000 for a used 20-foot unit, making it a budget-friendly alternative to traditional stick-frame sheds that can exceed $15,000–$20,000.
- Proper site preparation—level ground, compacted gravel or concrete foundation, and drainage planning—prevents rust, settling, and frost heave damage to your container structure.
- Securing permits and understanding local zoning regulations before installation avoids costly fines; always contact your building department first to confirm requirements and setback distances.
- Install ventilation (exhaust fans, gable vents), insulation (4–6 inches foam), and dedicated electrical circuits (20-amp for tools, 15-amp for lighting) to transform a shipping container garage from a metal box into a functional workshop.
- Separate workflow zones by function (dirty work like welding away from clean assembly areas), use sealed concrete or epoxy flooring for safety, and mount overhead LED lighting to maximize the limited 7-foot-8-inch ceiling height.
Why Choose a Shipping Container Garage for Your Workshop
A shipping container garage solves a common problem: real estate costs eat into hobby budgets. A used 20-foot container (roughly 160 square feet interior) typically runs $2,000–$4,000 depending on regional availability and condition. Compare that to building a 160-square-foot frame garage, which can easily exceed $15,000–$20,000 before finishing.
Containers also arrive with structural integrity already baked in. The corrugated steel walls and box-beam frame handle weather, rodents, and UV better than plywood. You’re not fighting rot or termites, you’re just adapting an existing shell.
For a woodworker, metalworker, or general DIYer, this matters because you can focus on the inside: layout, lighting, dust control, and tool storage. Containers don’t need a deep foundation: a gravel pad or concrete pier can work. And if you change your mind or move, a container is portable in ways a permanent structure isn’t. You do lose some ceiling height (typically 7 feet 8 inches interior on a standard 20-footer) and you’ll need to cut door and window openings, but both are manageable for an experienced DIYer who isn’t afraid of cutting steel.
Essential Planning and Site Preparation
Before the container arrives, nail down three things: the site itself, utility access, and local rules.
Site Selection and Foundation Start with level ground. A soft-soil lot needs proper prep: aim for at least 4 inches of compacted gravel or a concrete slab. If you’re placing the container on pier blocks or ground beams, verify the soil won’t settle unevenly, frost heave in cold climates can rack the container out of square. Check for drainage: water pooling around a container leads to rust and moisture inside. A slight slope away from the structure is your friend.
For electrical, water, or compressed air lines running to the container, plan the route before delivery. Underground conduit from your house to the container avoids trip hazards and protects wiring.
Utility Planning Bring in 240-volt power if you’ll run a compressor, welder, or table saw. A simple single-circuit setup might run off an existing 120-volt outlet, but that limits simultaneous tool use. Plan for LED lighting, efficient and heat-free, and a dedicated 20-amp circuit for outlets. Note any water taps you’ll need and confirm your site has slope for drainage.
Securing Permits and Legal Requirements
Not every jurisdiction requires a permit for a container structure, but most do. Some municipalities classify containers as “accessory structures” (no permit needed if under a certain size), while others require full approval regardless. Call your local building department, describe the intended use (workshop, not dwelling), and ask specific questions: Do I need a permit? What’s the setback distance from property lines? Are there restrictions on wall height or exterior finish? Some jurisdictions require a geotechnical report if the soil isn’t stable.
Zoning rules vary wildly. An agricultural zone might allow a 40-footer unpermitted: a residential neighborhood might cap you at 10% lot coverage. Asking first saves a $1,500 fine and a demolition order later. Document everything in writing, email the building official with your plan, and get confirmation. If you’re modifying a container with large openings or structural cuts, structural plans from a local engineer (roughly $300–$800) might be mandatory before permit approval.
Core Modifications for Functionality
Once the container is in place and permits are squared away, the real transformation begins. The container box is weather-tight, now you make it livable and functional.
Cutting Door and Window Openings A shipping container arrives with two doors (one end) and no windows. Use a reciprocating saw with a metal-cutting blade or an angle grinder to cut new openings. Mark your cut line clearly, measure twice, cut once. Wear heavy gloves, eye protection, and a dust mask (metal particles are nasty): the edges of cut steel are razor-sharp, so deburr any raw edges with a file or a die grinder. A typical pedestrian door opening is 36 inches wide and 80 inches tall: frame it with angle-iron and bolt or weld reinforcement around the perimeter to prevent flexing.
Windows reduce the bunker feel and improve ventilation. Two 36×36-inch fixed openings on opposite walls work well for cross-breeze.
Ventilation, Insulation, and Climate Control
Ventilation A sealed metal box bakes in summer and sweats with condensation in winter. Install gable vents or a ridge vent if you’re adding a peaked roof: if you’re keeping the flat top, two roof-mounted exhaust fans (one intake, one exhaust) create circulation. Size them for the container’s volume, a 20-footer needs roughly 1,000 CFM of air exchange per hour under typical load. Dust collection is easier if you isolate tool usage to one zone, but even a basic exhaust fan makes a difference.
Insulation and Thermal Control Cold climates demand insulation. Spray foam ($0.50–$1.50 per board foot) is quick but pricey: fiberglass batts ($0.30–$0.60 per foot) require vapor barrier and framing. Metal conducts temperature rapidly, so expect thermal bridging through studs. A 4-inch foam layer on walls and ceiling (R-20 value) is a reasonable middle ground for moderate climates. In freezing zones, you may want 6 inches (R-30+). Ventilation prevents moisture buildup, so pair insulation with exhaust fans.
A small space heater or portable AC unit handles seasonal extremes. Don’t size it like a house, a 1,500-watt garage heater (roughly 5,000 BTU) handles a 20-foot container in most temperate climates, though colder regions might need 7,500–10,000 BTU.
Electrical Rough-In Run conduit before closing walls. A subpanel inside the container fed from a 200-amp main service gives you flexibility. Plan for at least 4–6 dedicated circuits: compressor outlet (20 amp), welding/tool circuits (20 amp each), lighting (15 amp), and reserve capacity. Use outdoor-rated GFCI outlets (grounded fault) near any moisture-prone zones. All wiring should be #12 copper minimum: hire a licensed electrician for the main feed and inspection, this isn’t a DIY gray area.
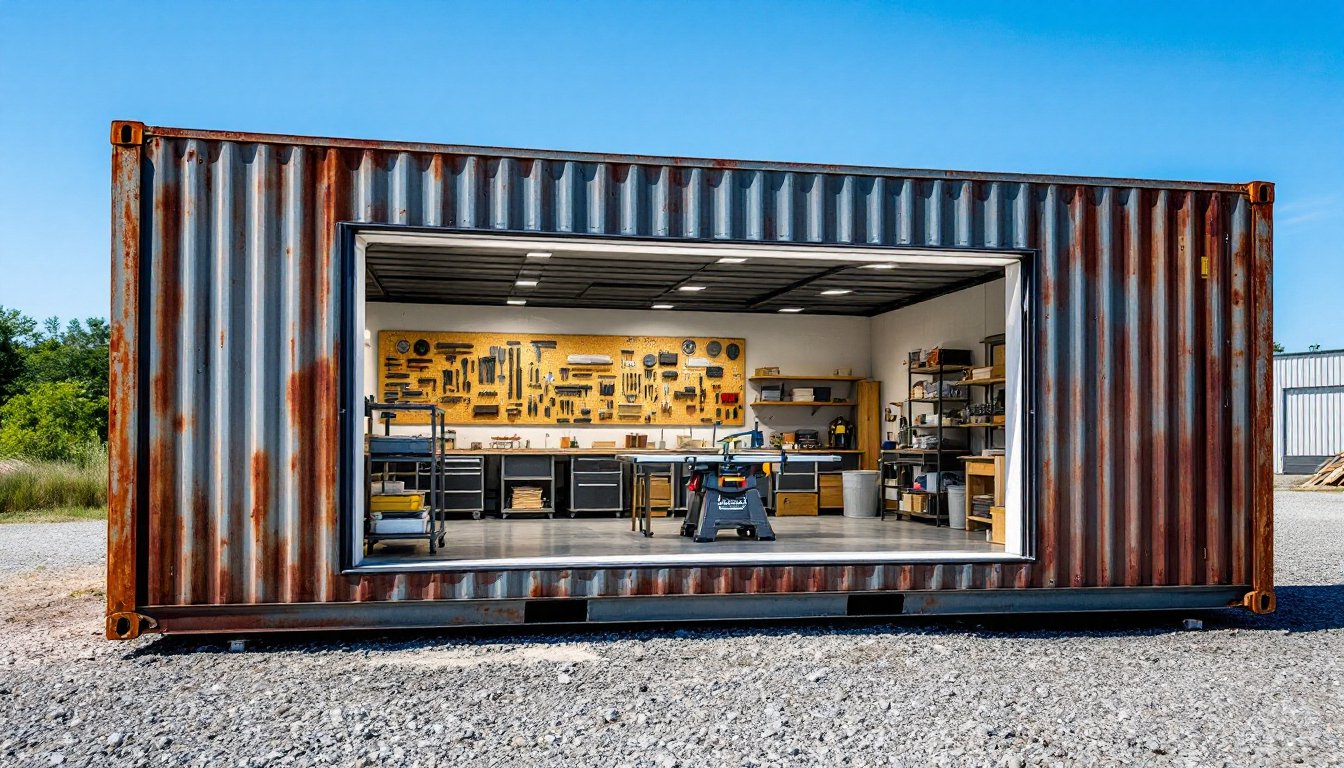
Optimizing Your Container Workshop Layout
Interior layout makes or breaks a workshop. A 20-foot container is roughly 20 feet long, 8 feet wide, and 7 feet 8 inches tall. Every square foot matters.
Zoning by Function Separate dirty (welding, grinding) from clean (assembly, finishing) zones. Place heavy equipment (table saw, compressor, lathe) on the long wall, away from doors. Mount smaller hand tools on pegboard or slat-wall: gravity is your enemy when you’re grabbing a wrench in a crouched space.
Flooring Bare steel corrodes and is slippery when wet. A sealed concrete floor (or epoxy coating) improves safety and durability. If concrete’s overkill, interlocking rubber tiles offer cushioning and better drainage. Budget $300–$800 for flooring prep and covering.
Lighting and Power Overhead LEDs are non-negotiable. Two 4-foot shop lights (roughly 100 watts total, daylight color) eliminate shadows and cut eye strain. Mount them on the ceiling perpendicular to your work areas. Task lighting (desk lamp, under-cabinet) handles detailed work. Power outlets should be 4–6 feet apart around the perimeter: running out of outlets forces daisy-chaining, which invites overloads.
Storage and Workbenches A 2-foot-deep workbench along one wall leaves walking room. Shelving above the bench keeps hand tools close. Steel shelving tolerates weight better than wood in high-vibration environments. Pegboard tool walls are affordable ($ 0.50–$1.00 per square foot) but limit weight: a slat-wall system ($1.50–$2.50 per square foot) handles heavier items and adjusts easily.
Acoustic and Dust Control A metal box echoes, a loud compressor or grinder becomes brutal. Hanging acoustic panels or a few layers of mineral fiber insulation behind perforated metal absorb noise cheaply. For dust, ceiling ducting routed to an external exhaust fan beats hoping air movement carries it out. A mobile dust collector parked near the worst offender (table saw, sander) captures chips before they scatter.
Conclusion
A shipping container garage isn’t magic, it’s a solid platform for a workshop if you respect the constraints and plan ahead. Site prep, permits, proper ventilation, insulation, and thoughtful layout separate a functional setup from a hot, moldy nightmare.
The heavy lifting is the utilities (electrical, water, HVAC) and structural cuts: everything else, shelving, workbenches, lighting, you refine over time. Start simple, add as you go, and don’t skip the fundamentals. A container workshop built right becomes a real working space, not just a storage shed with a name.